
Analog Output Voltage vs. Detection Distance
In this page, I will make available source code and provide some insights with regards to programming PIC microcontrollers for robotics applications. I have written code to configure and control PWM, GP2D12 Sharp sensors, QRB1114 sensors, ISD VoiceCorder chips, SRF04 ultrasonic modules, 2-wire LCD interface, Vector 2X digital compass, etc. I have also built libraries to store configuration and calibration data to EEPROM data memory, timer library and non-blocking library to send character on serial interface. My goal with this page is to share as much as possible of the knowledge I have gained playing with these devices.
Source code examples in these pages have been written in C for CCS PICC compiler. CCS provides a set of macros that simplifes the use of various microcontroller modules (timers, analog/digital ports, serial communication, etc.). Without these macros, the programmer has to play directly with various registers to configure and control the different modules. Although this is not that difficult, the macros are easy to use and quite convenient.
For port to other PIC compilers, refer to files picinterface.h and picinterface.c. I have implemented in these files a CCS PICC compatible set of macros that accesses the appropriate registers for timer, PWM, SPI, ADC, interrupt handling functions. These files have not been tested yet. They are merely used as a reference point.
The timer service is one of the basic services offered by a microcontroller. Although CCS compiler provides some simple macros that implement delay routines, in order to determine time elapsed and to maximize use of MCU (see Simple Scheduler section), understanding of the timer functionality is necessary.
To introduce delays in an application, the CCS macro delay_ms and delay_us can be used. These macros provide an ability to block the MCU until the specified delay has elapsed.
For tasks that require the ability to measure time (for instance, how much time has elapsed since a given pin has transitioned to low), it is possible to write code that uses the microcontroller timers.
There are three timers on the PIC16F877: Timer0, Timer1 and Timer2 (there is also a watchdog timer, but it is not typically used to drive application based behavior).
Timer0, Timer1 and Timer2 are essentially counters that increment based on the clock cycle and the timer prescaler. An application can monitor these counters to determine how much time has elapsed. On PIC16F877, Timer0 is an 8-bit counter whereas Timer1 and Timer2 are 16-bit counters. Individual timer counters can be set to an arbitrary value using CCS macro set_timer0, set_timer1 or set_timer2. When the counter reaches its limit (255 for 8-bit and 65535 for 16-bit counters), it wraps around to 0. Interrupts can be generated when wrap around occurs. Timer2 is normally used for PWM or capture and compare functions.
Each timer can be configured with a different source (internal or external) and prescaler. The prescaler determines the timer granularity. A timer with a prescaler of 1 increments its counter every 4 clock cycles (1,000,000 times a second if using a 4 MHz clock). A timer with a prescaler of 8 increments its counter every 32 clock cycles.
Given that Timer1 is set up with a prescaler of 8 on a MCU clocked at 20 MHz. If Timer1 is reset to 0 and the application performs a certain task and if the value of Timer1 read at the end of the task is 6 250, the application can assume that a delay of 10 ms has taken place. To determine the delay, use the following formula:
delay (in ms) = (# ticks) * 4 * prescaler * 1000 / (clock frequency)
or in our example:
delay (in ms) = (# ticks) * 4 * 8 * 1000 / 20 000 000
or
delay (in ms) = (# ticks) / 625
This translates in our example to:
delay (in ms) = 6 250 / 625 = 10 ms
Here is some sample code that shows how to initialize and use the timer
to determine the length of a task:
long delay;
/* Set Timer1 prescaler to 8. */
setup_timer_1(T1_INTERNAL | T1_DIV_BY_8);
/* Reset Timer1 to 0. */
set_timer1(0);
/* Perform some task. */
printf("Hello, world!");
/* Calculate delay in ms. */
delay = get_timer1() / 625;
In the above example, it is important that the task performed does not exceed the maximum delay a timer can sustain before wrapping around, otherwise, the calculations may be incorrect.
Here is another code sample that shows how to create a delay of 50 ms
before resuming execution (alternative to delay_ms):
/* Set Timer1 prescaler to 8. */
setup_timer_1(T1_INTERNAL | T1_DIV_BY_8);
/* Reset Timer1 to 0. */
set_timer1(0);
for ( ; get_timer1() < 3125; ) ;
/* 50 ms has elapsed. */
PWM can be used to control a motor driver or generate sound samples.
The register specifically used to configure PWM are the TRISC, PR2, CCP1CON, CCP2CON, CCPR1L, CCPR2L and T2CON registers. There are two PWM channels on the PIC16F877. These modules are coined CCP1 et CCP2. These modules are implemented on pins 16 and 17 of the PIC16F877. There are two ways to connect these pins to a L293D H-Bridge. I recommend to connect these to the L293D Chip Enable pins. PWM then controls the percentage of time the chip is enabled.
There are two parameters that affect the behavior of the PWM. The first one is the frequency of the pulses, the second is the length of these pulses. The length of the pulse is also called the duty cycle, e.g. the percentage of time the motor is enabled. In an ideal environment, if a motor normally exhibit 100 RPM, then it should do 25 RPM with a 25% duty cycle.
It is important to experiment with these parameters to find the configuration that is right for your application because no two motors are the same. Some motors are better when the frequency is low (between 2 000-5 000 Hz). Other motors are best when the frequency is high, say between 15 000 and 20 000 Hz. Note that a low frequency (between 1 000 and 8 000 Hz) will produce an audible sound that can be very annoying. I have tested three robots with varying weight (500 g to 15 kg) and with different motors and have found that a frequency of 15 000 to 20 000 Hz gives good results. I have never seen any robot move with a duty cycle of less than 50%. If you want to do this, you have to find ways to control PWM in software, i.e. for a duty cycle of 25%, use a 50% duty cycle and turn PWM 50% of the time. Ideally, you will find motors that are not too fast at 50% and fast enough at 100%.
The TRISC register must be initialized so that RC1 et RC2 are identified as output ports (bits 1 and 2 of TRISC must be set to 0).
CCP1CON and CCP2CON are used to configure CCP1 and CCP2 modules mode. A value of 12 configures these modules for PWM mode.
Timer2 is used by CCP1 and CCP2 modules for PWM purposes. Timer2 prescaler is configured using bits TCKPS0 et TCKPS1 of T2CON register (bits 0 and 1). A value of 0 for these two bits configures a prescaler of 1. Bit TMR2ON (bit 2) must be initialized to 1 to start Timer2.
PR2 register controls the pulse frequency. The formula used to calculate the pulse period is:
(PR2 + 1) * 4 * TOSC * (Timer2 prescaler value).
Pulse frequency is 1 / period. If PR2 is equal to 255 and the PIC runs at 20 MHz, pulse frequency is 19.53 kHz with a Timer2 prescaler of 1, i.e. 1 / ((255 + 1) * 4 * 1 / 20 000 000 * 1).
The CCPR1L et CCPR2L registers configure the "duty cycle". The "duty cycle" is relative to PR2. If PR2 is 100 and CCPR1 is 50, then the "duty cycle" is effectively 50% (half of PR2).
CCS provides macros to configure these registers appropriately. Here is an example program that shows how to configure PWM with CCS:
The GP2D12 is an analog infrared proximity sensor. It can be used to detect obstacles. This sensor has a LED that emits infrared light. Infrared light has the interesting property that it bounces on obstacles. On the front of the sensor, beside the LED that emits the infrareds, there is a photodiode that is sensible to infrared light. It will vary the output voltage based on the amount of infrared light that bounces back to the sensor. Roughly speaking, the more infrared light it sees, the closer is the object and the higher the output voltage generated by the photodiode.
If the voltage output is connected to a microcontroller with analog to digital conversion capability (such as a PIC16F877 microcontroller), it is possible to translate this voltage to a numerical value. This value can be used to determine whether or not there are obstacles close to the sensor and how far these obstacles are.
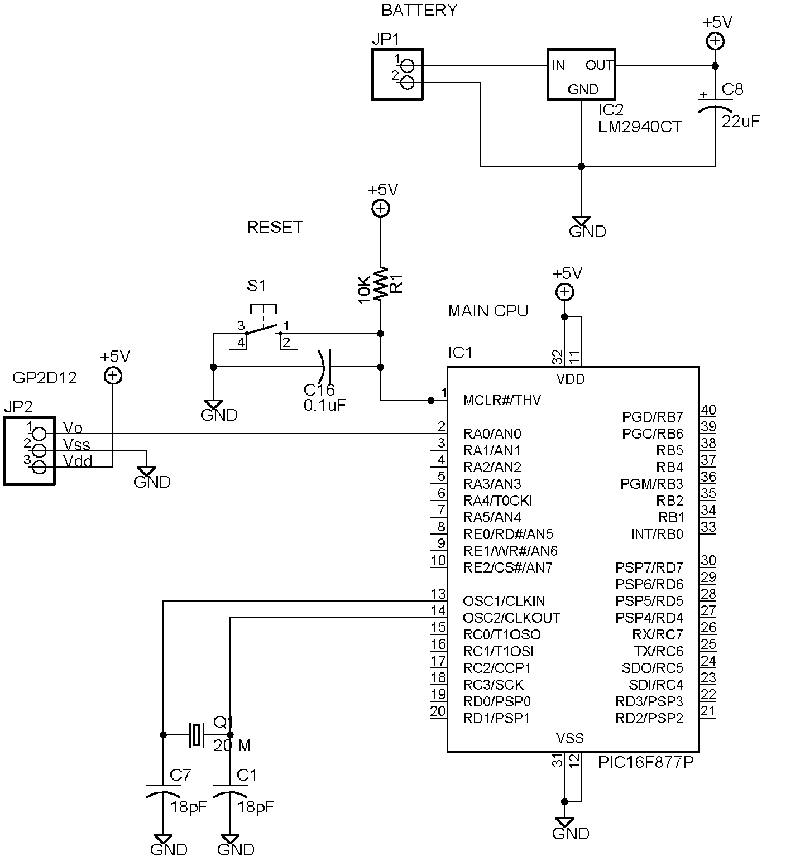
File gp2d12.c shows C source code example for the CCS PICC compiler of how capture ADC value and how to convert it into a measurement in centimeters. The GP2D12 circuit shows how to interface a PIC16F877 microcontroller to a Sharp GP2D12 sensor.
Note that in this example, it is assumed that the sensor is tucked in ten centimeters within the robot. This is necessary because the voltage output curve climbs for the first ten centimeters and then drops (see chart below), which means that there is a range of voltage values that account for two different distances. By placing the sensor inside the robot, we avoid this ambiguity in sensor reading.
Analog Output Voltage vs. Detection Distance
The SRF04 ultrasonic module allows detection of objects up to 3 metres. This sensor sends an ultrasound signal on the transmitter and waits for the echo to come back on the receiver. To determine the distance travelled between the sensor and the closest obstacle, we need to figure out the time elapsed to receive the ultrasonic echo. Using the speed of sound constant (347 m/s), we can approximate the distance to the closest obstacle. For information on these sensors, refer to Devantech pages:
SRF04 - Ultrasonic Range Finder
File srf04blk.c shows the source code of the SRF04 driver for the PICC CCS compiler. In this example, we use Timer1 to calculate elapsed time.
To get a measurement, the driver activates the transmit line. It then monitors the receive line and calculates the duration of the pulse (transition from low to high, then high to low). The length of the pulse indicates how long the ultrasound has taken to echo back to the sensor.
The Winbond ISD4003 VoiceCorder integrated circuit allows for the recording of analog audio on non-volatile memory in digital form and provides a mechanism to play back this audio stream. This chip is controlled with a Serial Peripheral Interface (SPI).
File isd4003.c shows the source code of the ISD4003 driver for the PICC CCS compiler.
OK, you have learned some techniques on how to read sensor values and control motors, but you are wondering how you can put all of this together to implement some sort of intelligent behavior in your robot.
As far as having sensor monitoring and motor driving functionality
all going at the same time, the simplest scheme consists in reading
all sensor values and then adjust the motor controls accordingly. For
instance:
If you use PWM to control DC motors, you would be able to get away with just a main loop that reads sensor values and then sets PWM to control the speed of each motor depending on the sensor readings.
If you use servos, you will probably want to put the motor control in an interrupt routine, because the timing needs to be fairly precise (pulses of 0.5 to 1.5 ms every 20 ms). You want your interrupt routine to be activated on a periodic basis and inject the appropriate pulse to make your motor turn at the appropriate speed. In this case, you might want to use a global variable to keep track of your motor speed. The sensor reading could be relegated to your main loop and adjust the motor speed global variable as required.
Depending on how much time you need to read each sensor and how how responsive your robot need to be, you might want to read some of the sensors asynchronously, just like the code I have written for the ultrasonic sensor (see below). The problem I had to solve when writing this code was to avoid to spend 40 ms each time I wanted to read this sensor. I found this to be too long to react, although if this was my only big delay. I would probably be OK polling the device, but this would be a definite problem if I had several such sensors on my robot.
If your robot is not too fast (~100 RPM), if your main loop takes less than 100 ms, you will probably be in good shape. More than that, you will have problem changing course to avoid obstacles or do some precision tasks. I made the ultrasonic reading routine asynchronous to make sure it didn't clog my main loop. I do not have to wait for the sensor to be done before I can act on other sensor data. My main loop takes less than a millisecond, so I can react really quickly to any sort of sensor event. I use a state machine to figure out at what stage I am in reading the sensor. When the reading is available, my program updates a global variable and is then be able to change its course depending on this reading.
There are several theories on mobile navigation, one of them is the subsumption architecture. Rodney Brooks's Cambrian Intelligence, which is by the way a very entertaining book, explains this architecture really well.
One of the toughest challenge for your robot is to be able to move in a straight line. It helps to have sound mechanics, but even then, you are not guaranteed to have a robot that moves straight. Often, two motors of the exact model don't quite turn at the same rate. Your robot may also not be calibrated very precisely, for instance, the center of gravity may not be dead center, or your wheel axle may be off by a fraction of a degree, which would make it turn slightly when moving forward. Or your gears may not have the same friction.
There are different techniques to keep your robot on a straight course. For DC motors, the most popular technique consists in using a wheel encoder to figure out how many rotations each motor is doing. If you detect one moves faster than the other, you can adjust the speed. Some people use PID algorithm to feed back some of the sensor data adjust control of the motor. Some other people use fuzzy logic. I recommend you to research the Web for some of this information.
If your robot moves in a close environment (a maze for instance), you can build a simple wall follower algorithm to attempt to go straight. The idea of a wall follower is to tell the robot to go straight until it is either too close or too far from the wall then turn the robot to get closer or further from the wall. If you have two side sensors on each side (one in front and one in the back), you can actually detect when the robot is not parallel anymore to the wall.
For certain precise tasks polling is not an option, you have to resort to the interrupt mechanism. Interrupts provide your application with an alternate path of execution. When certain events occur and interrupt service routines are defined, control can branch off to these specialized routines. Current execution is suspended until the interrupt service routine is finished, then control is given back to the application which can pick up where it left.
There are several types of interrupts. Here are the major ones:
You may want for instance your program to run normally (through the main loop), until the microcontroller receives a character on the UART port. You can then, in the interrupt routine, transfer this character in some part of the memory, set a global flag, and later in the main loop consume this character. A similar technique can be used, but with the transmit interrupt, to send characters on the serial port without blocking the MCU. In this case, the characters to send out are transferred into memory in a ring buffer and transmitted in the background using interrupt routines without blocking the MCU. This is specially important since sending a stream of character at low speed (say 9600 bauds) can take several millisecond and would prevent the application from doing other tasks that may be more critical.
In CCS, interrupt service routines are normal function that are preceded
with #int_xxx. For instance, a Timer1 interrupt service routine would be declared
as follows:
To enable interrupts, the global interrupt bit must be set and then the
specific interrupt bits must be set. For instance, to enable Timer1 interrupts,
one would program the following lines:
enable_interrupts(GLOBAL);
enable_interrupts(INT_TIMER1);
If you want to stop the application from processing interrupts, you can disable the interrupts using disable_interrupts CCS macro. You can either disable a specific interrupt or all interrupts using the GLOBAL define.
Listing srf04.c is a modified version of the SRF04 driver presented in section Interfacing a PIC16F877 with a SRF04 ultrasonic sensor. This new version uses interrupts to prevent the program from blocking while waiting for sensor input.
We have placed the detection of the receive pulse in an interrupt service routine (ISR) to allow the system to continue processing other things while waiting for the pulse to complete. We use interrupt in this program to prevent blocking the microcontroller for an extensive period of time (it can take up to 36 ms to get the echo back). 36 ms may not seem like a long time, but if you have many sensors to poll, use of interrupts may be required for your system to be responsive to its environment. A mobile platform usually has no more than 100 ms to react to its environment.
To determine the distance, we must perform a sequence of input and outputs on the sensor interface pins. We use a state variable to determine at what stage of the sequence we are and help us figure what we should be doing next. Currently, the program does not perform other tasks than interfacing with the SRF04, but it would be possible to perform other duties in the main loop while waiting for the interrupts to progress the state of SRF04 monitoring process.
Another technique used to minimize the response time is to dedicate a microcontroller to the polling of the sensor and provide on this microcontroller an interface to report the sensor measurement (I2C seems like a good interface choice for reporting purposes). If an external module polls the microcontroller for a measurement while the microcontroller is in the middle of calculating the sensor value, the microcontroller can report right away the last acquired value. By doing this, the module that polls for the sensor value is not blocked waiting for the response. The only delay incurred is the communication delay.
Now, let's combine what we have learned about timers and interrupts to build a simple scheduler. The goal of this exercise is to build a framework that will allow the microcontroller to run some tasks in parallel to maximize MCU usage.
With the scheduler, you may want to initiate reading the ultrasonic sensor on a periodic basis, but while waiting for the echo to come back, you may want the ability to perform some other tasks. You can program the scheduler to launch the ultrasonic sensor reading every 50 ms and give back control to other tasks while waiting for the echo.
The approach that is presented in scheduler.c is the following:
Work in the interrupt service routine must be minimal to avoid skewing of the clock. Real work is left to the main loop and will be performed there when high priority tasks are not happening (i.e. when interrupts don't need to be serviced). Work in the main loop is triggered by application timer global variables.
To be able to get timer interrupts at the required precision, set Timer1 in such way that it wraps around (which causes an interrupt) at the required precision. In our example, the precision is one millisecond. We require the timer to be set up with the right prescaler and to be reset to the right value at the end of each interrupt cycle. With a clock of 20 MHz and a prescaler of 8 (T1_DIV_BY_8 parameter in setup_timer1), it takes 625 ticks for Timer1 to wrap around in one millisecond. This is calculated as follow:
#ticks = clock frequency / 4 / prescaler / 1000
With a 20 MHz clock, this expression simplifies to:
#ticks = 5000 / prescaler
In timer1_interrupt, we set Timer1 625 ticks before it wraps around by calling set_timer1(-625).
There are two series of global variables used to keep track of time intervals. The first series consists of variables t1mS, t10mS, t100mS and t1S. These variables are used to detect when 1 ms, 10 ms, 100 ms or 1 s have elapsed. The second series (t1mS0, t10mS0, t10mS1, t100mS0, tS0 and tS1) is application specific and is used to trigger the different tasks at appropriate frequency. For instance, in our example, for the flashing LED on pin RB4 task to take place every 250 ms, t10mS1 has to reach a count of 25 (25 * 10 ms) in the main loop. Once the task is done, we reset the application timer variable.
In our example, we have used Timer1, but we could have used Timer0 or Timer2. Timer2 can only be used if it is not required for other purpose, like the PWM or capture and compare module. Timer0 wraps around every 256 ticks, but its prescaler can go up to 256. Timer1 is a 16-bit counter, so it wraps around every 65 536 ticks. Its prescaler can be set up to 8, so the total duration of Timer1 is 8 times as long as Timer0.
You may need to tune your application to allow it to behave properly. You want to prevent a task to starve other tasks. Starving could happen when too many interrupts are happening, when interrupts take too long to be serviced or when a task in the main loop eats up too much CPU. When a task really needs to run for long durations, you will want to split the work in smaller chunks and will use some global variables to keep track of the state of the work.
On the PIC, it is not possible to write a fancy scheduler. On more advanced chip architectures, the scheduler can enforce to a certain degree that each task be given enough time to perform its work, which makes the programming much simpler. In such architecture, it is possible to assign priorities on each task and the scheduler may preempt a task with lower priority when a task of higher priority is ready to run. On the PIC16F, the programmer needs to handle this complexity, mostly because there are only two priorities (interrupt and application code) and the stack and RAM are very limited.
Altough this may seem difficult to do in the first place, with experience and for most microcontroller applications, this is not hard to achieve. It must be noted however that debugging interrupt service routine is more challenging than debugging user application code because the programmer cannot rely on traditional debugging mechanisms like logging (printf). Use of an in-circuit debugger facilitates this task immensly. Otherwise, monitoring signals on different pins (voltage levels or status of LEDs) may be the only way to troubleshoot problems in this area.
To contact me, send an email to user mdubuc at freeshell.org domain.
Last updated: March 19, 2005